Before we start
Please note that overworld (world) is locked from being reset. You can only reset nether, end and custom worlds.
Start by opening the menu
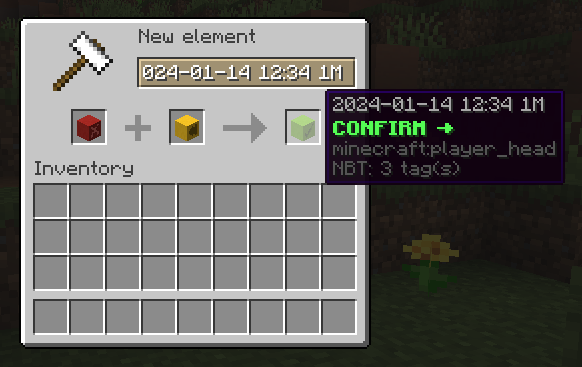
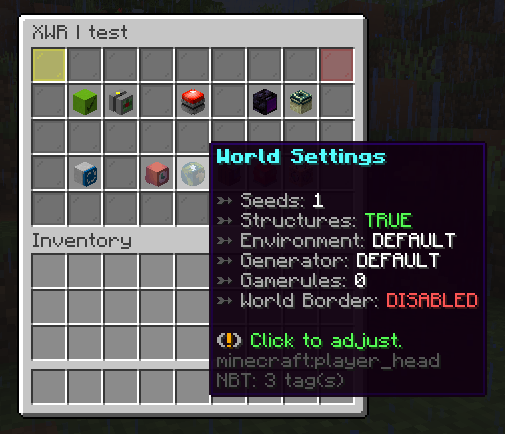
Open your menu by using the command /xwr menu. You should see a menu like this:
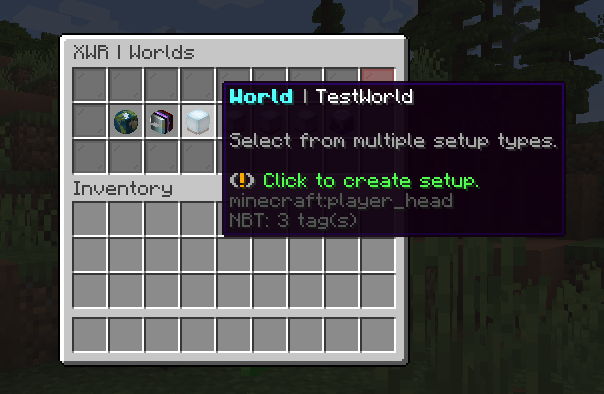
You now have multiple options to choose from. You can either create a new world setup or edit an existing one. Clicking on one of the “ready to be set up” worlds will open a new menu which will ask you if you want to create a TP-only world or resetable world. If you want to create a TP-only world, click on the TP-only world button. If you want to create a resetable world, click on the resetable world button.
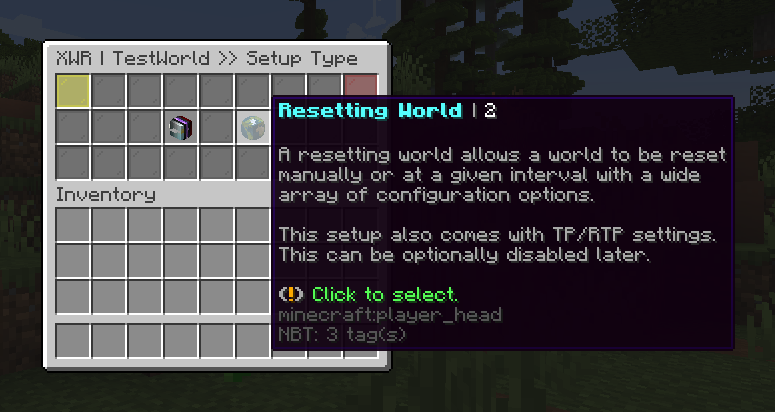
Creating a reset world
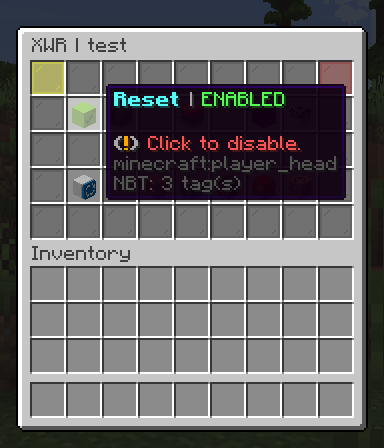
First thing to check
When you successfully created the setup, you will see a big menu with a lot of options. You should now find the green button in the menu, that indicates if the world can be reset. Check if the state says “Enabled”, to enable the world to be reset. If it says “Disabled”, click on the button to enable it.
Teleportation
Reset worlds also have a teleportation module available for use. You can enable it or set it up by clicking next to the green button. There, you will find many settings such as spawn location, teleportation cost, random teleport module, warning or even teleport them to a desired location when they leave the server.
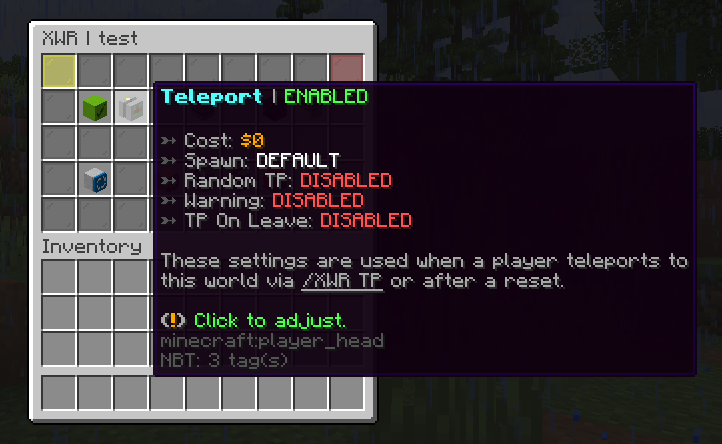
Everything is pretty much self-explanatory. You also have comments of what those buttons do and how you can set them up. If you’re still confused, you can always ask us on our Discord server.
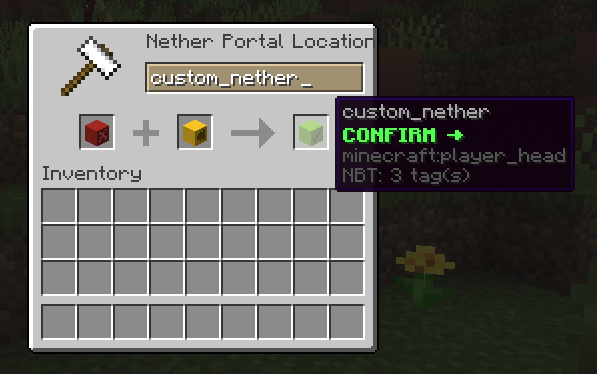
Nether/end portal linking
Premium users also have access to portal linking module, which will rewrite the world’s nether/end portals to the new world. You can enable it or set it up by clicking in the right corner on two buttons. One is for nether and the other one is for end.
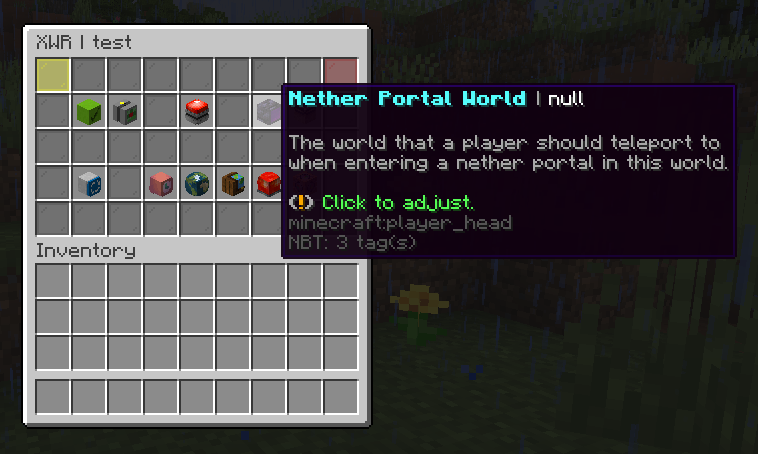
You will be prompted to type the new world name. If you want to disable the portal linking, click on the middle button named “Reset”, to disable this function.
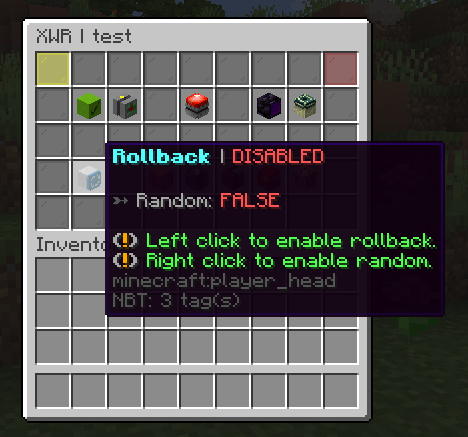
Rollback
Rollback has two option. The first one is to reset back to the previous saved state, or second one is to reset to a random state chosen from multiple saves. You can enable it or set it up by clicking on the arrow button in the left corner. Use right and left click to choose enable/disable and random/previous state.
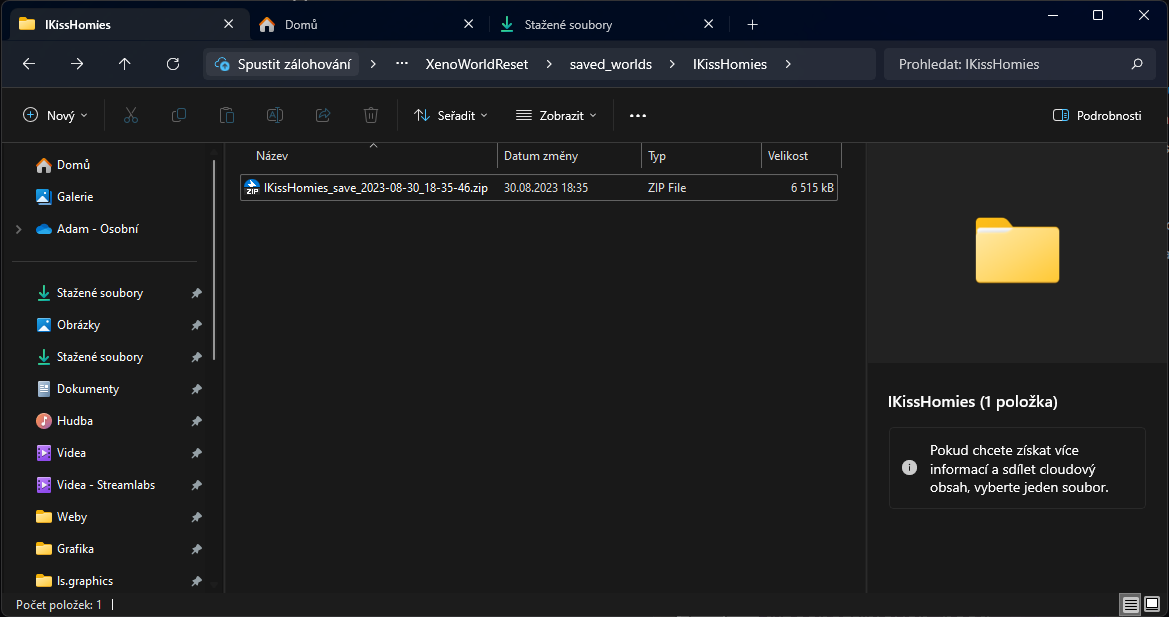
The rollback saves are created every time you trigger /xwr save command. All available saves are visible inside plugins/XenoWorldReset/saved_worlds folder. You can also delete the saves by deleting the files inside the folder.
Schedulers
Schedulers are used to automatically reset the world and play an essential part in XenoWorldReset. You can set up multiple schedulers for each world. You can enable it or set it up by clicking on the clock button next to the globe one.
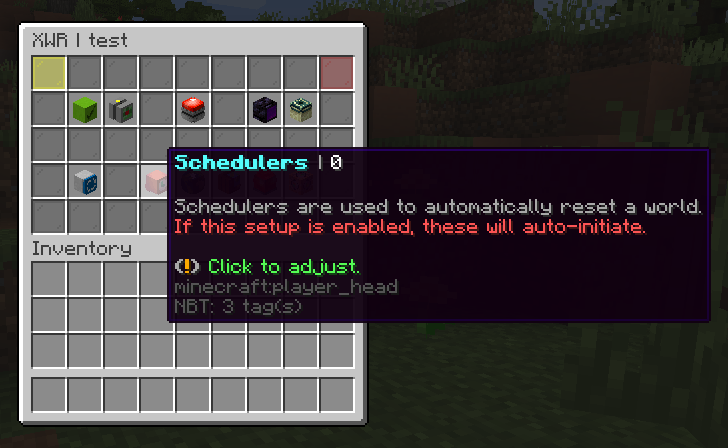
You will see a list of available schedulers. You can add a new one by clicking on the green button. You can also edit or delete the existing ones by clicking on the white buttons.
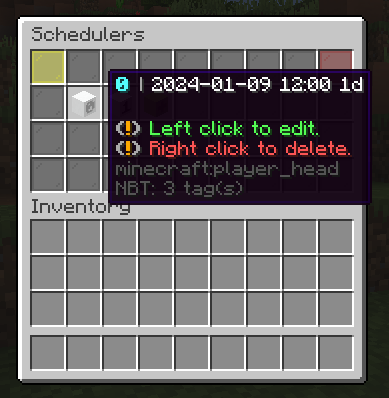
When you create a new scheduler, you will be introduced to a menu, where you need to properly set up the scheduler date, time and (optional) interval. You can find more about how to set up the scheduler in the Schedulers wiki page.
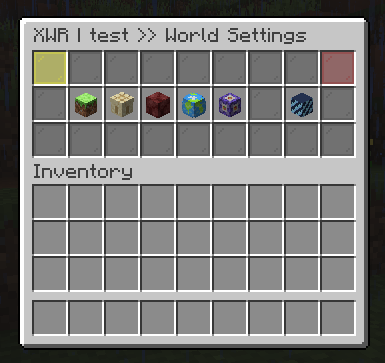
World settings
World settings utilize functions you already know from other world management plugins or even from the vanilla Minecraft.
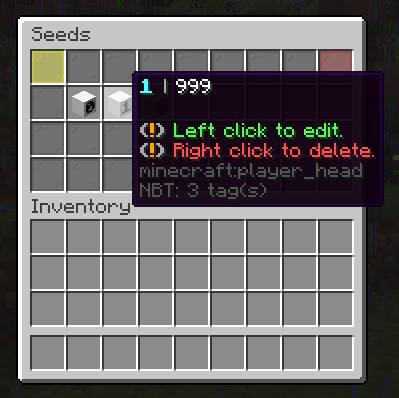
Seeds
You can have multiple seeds for each world. The plugin will rotate between those seeds when resetting the world. You can also only add one seed, if you want to keep the world the same.
You are able to use different types of seeds. For example:
DEFAULT- will use the same seed as beforeRANDOM- will generate a random seed123456789- will generate a seed from the numberCWR_IS_AWESOME- will generate a seed from the string
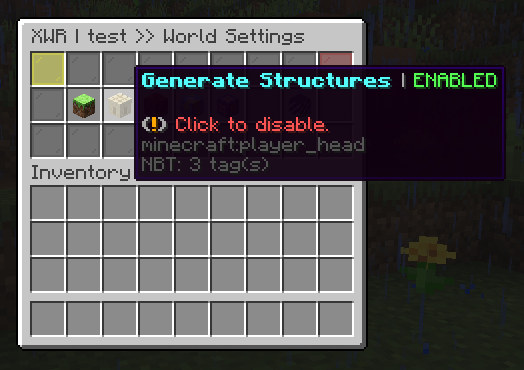
Structures
Don’t want villages, strongholds or other structures to be generated? You can disable them by clicking on the structures button.
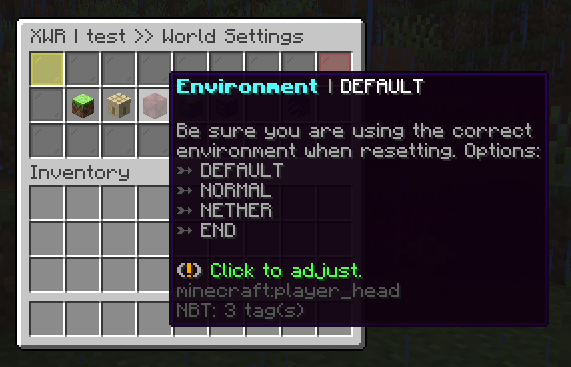
Environment
You can set up different environment for your world. For example you can create your own nether or end.
Generator
Generator is useful if you want to create your world with a custom generator using someone’s plugin. You can also use the default generator, if you want to keep the world the same.
We’ve tested the following plugins and they work with XenoWorldReset:
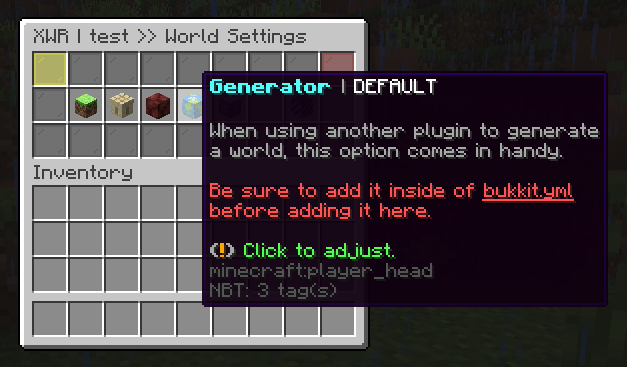
Please don’t forget that you also need to specify the generator in the bukkit.yml file. Without that, you will get a lot of problems…
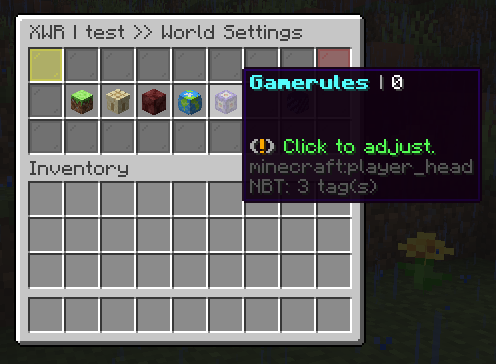
Gamerules
You can save gamerules and apply them on every reset of the world. See Minecraft.wiki for a list of gamerules available for use.
For example, you can type here doDaylightCycle: false to disable the day/night cycle.
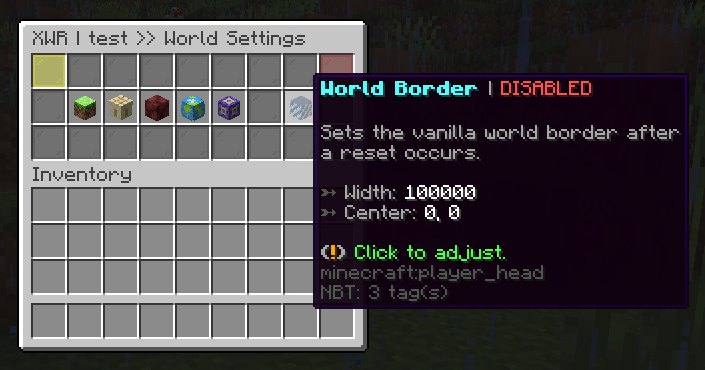
World border
You can set up a width and a center of your world border. The world border will be automatically set up when the world is reset.
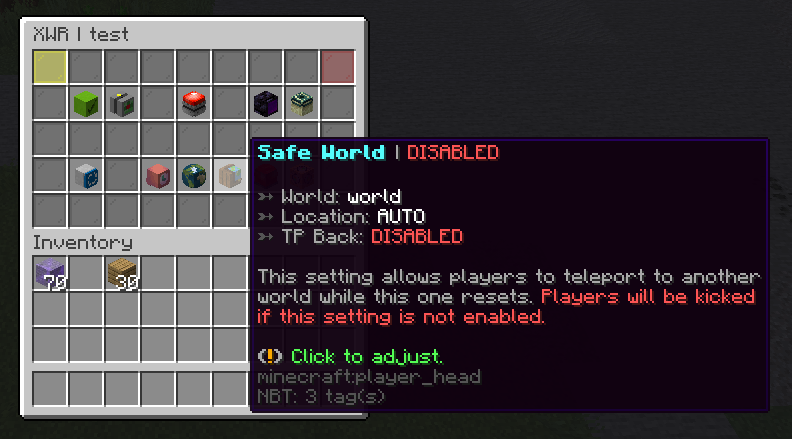
Safe world
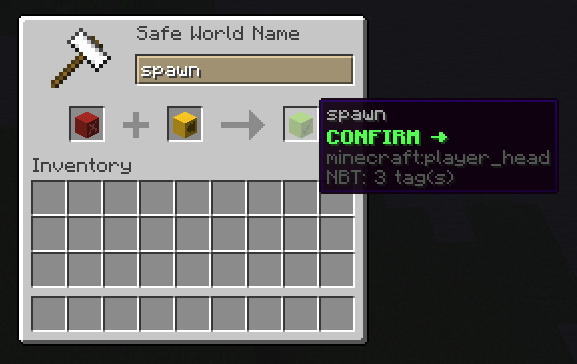
Safe world is a world, where players will be teleported on every reset. This will disable kicking players from the server, when the world is being reset. You can set up a safe world by clicking on the safe world button.
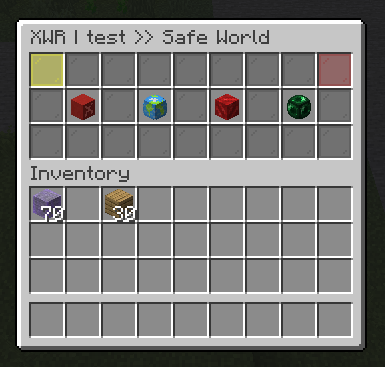
World to be teleported to
Cannot be same as the world that is being reset (this world setup).
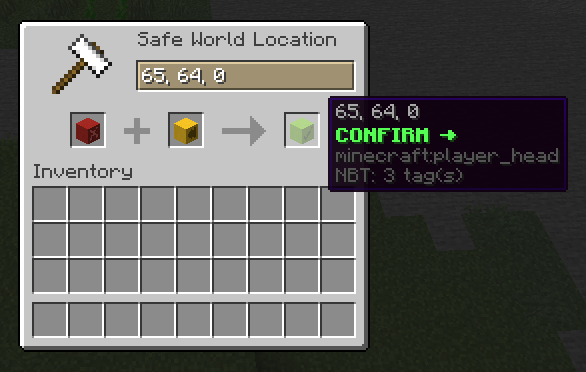
Teleportation location
You can choose between multiple options:
AUTO- detects/uses safe world’s TP systemDEFAULT- uses the default spawn location (world spawn point)X, Y, Z- uses the specified coordinates
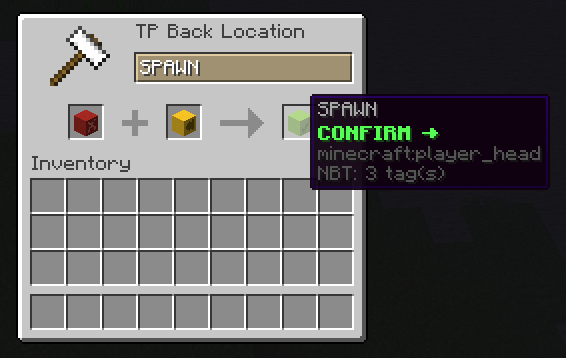
Teleport back
Teleport back uses similar options as teleportation location. You can choose between multiple options:
LAST-KNOWN- teleports player to the last known location before the resetSPAWN- teleports player to the spawn location (world spawn point)RANDOM- teleports player to a random location in the world (if it’s enabled)X, Y, Z- teleports player to the specified coordinates
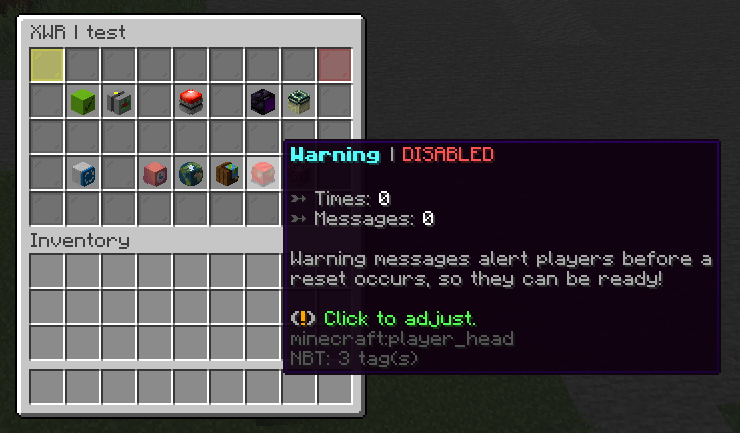
Reset warning
You can set up a warning message, that will be sent to all players on the server before the world is reset. You can set up a warning message by clicking on the warning button.
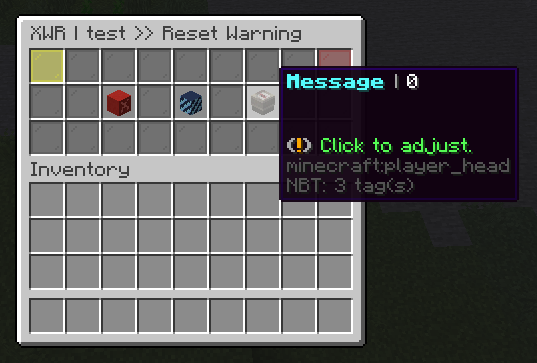
Times
You can have multiple times before the reset. When the time from times category is reached, the messages from messages category will be sent to all players in this world. You can add a new time by clicking on the green button. You can also edit or delete the existing ones by clicking on the white buttons.
You can even use some “placeholders” in the messages. For example, {timeUntilReset} will display the time in seconds until the world is reset.
All available placeholders are visible in lang.yml file on the bottom.
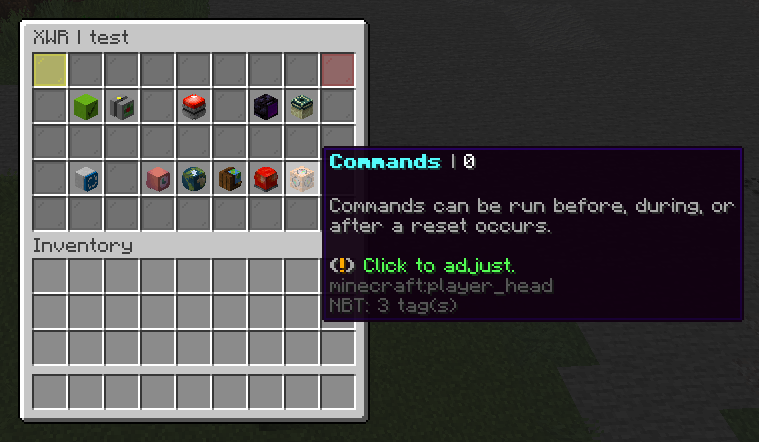
Commands
You can set up commands, that will be executed on every reset of the world. They are multiple post options. Either you can set before, during or after the reset. You can also set if it’s gonna set to console, world, or globally. You can add a new command by clicking on the green button. You can also edit or delete the existing ones by clicking on the white buttons.
Here are some examples of what you can do with commands:
[before] [world] tell {player} this is a test message before the reset![during] [global] tell {player} the world {world} is currently being loaded![after] [world] tell {player} the world {world} has been reset!
Here are available prefixes:
Category 1 - Group prefixes:
[console]- executes as console (once)[world]- executes for every player in the resetting world[world:op]- executes for every player in the resetting world as op[world:console]- executes as console for every player in the resetting world[global]- executes for all online players[global:op]- executes for all online players as op[global:console]- executes as console for all online players
Category 2 - Timing prefixes:
[before]- before the world resets[before:5]- before the reset with a 5 tick delay[during]- during the world reset[during:10]- during the reset with a 10 tick delay[after]- after the world resets[after:20]- after the reset with a 20 tick delay
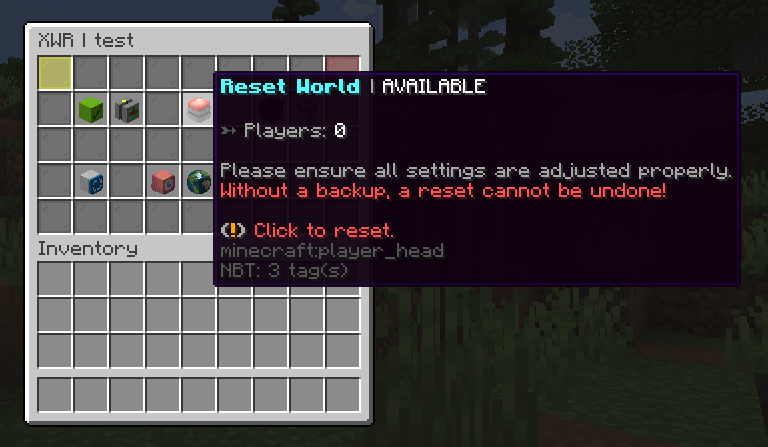
Reset the world
When everything is set up correctly and you’re satisfied with the settings, you can try to reset the world. Click on the red button in the menu, that is used for world reset. The indicator should say that the “Reset World” button is “Available”. You will be asked if you really want to reset the world. Click on the green area to confirm the reset.